Materials · 5 October 2026
Backlit Acrylic Panels: How an Even Lit Surface Is Specified and Built
A backlit acrylic panel either reads as one continuous lit surface or as a box with lamps behind it. The difference comes down to the diffuser grade, the LED pitch against the cavity depth, and how the light source is specified and maintained.
A backlit acrylic panel either reads as one continuous lit surface or as a box with lamps behind it. Most of what separates the two is decided before anything is fabricated, and almost none of it is about the acrylic being clear enough.
- Diffuser grade, not clear acrylic — clear sheet shows every LED behind it.
- Cavity depth against LED pitch — roughly 1:1 for a direct-lit build is a sound starting point.
- One colour temperature, one batch — mixed binning makes adjacent panels read differently.
- Seal the cavity — dust is invisible unlit and obvious once lit.
Start with the diffusion
The instinct is to specify clear acrylic because the surface needs to look sharp. In a backlit build this is backwards. Clear sheet transmits light without scattering it, so every LED behind the panel appears as a distinct bright point. What you want is an opal or LED-diffuser grade, which scatters light across the panel so the illumination arrives as an even field.
Diffusion costs brightness — the more a grade scatters, the more light it absorbs — so the grade and the LED output are specified together, not separately. A heavily diffusing sheet over an underpowered array gives a flat, dull panel; a light diffuser over a dense array gives an even but harsh one.
Cavity depth is the cheapest fix for hotspots
Most uneven backlit panels are not a material problem. They are a geometry problem. Light leaving an LED spreads in a cone, and adjacent cones need room to overlap before they reach the panel. If the cavity is shallower than the spacing between LEDs, they have not merged yet and you see the array.
As a starting point for a direct-lit build, make the cavity depth about equal to the LED pitch — 50 mm spacing wants roughly 50 mm of depth. Tighter spacing lets you go shallower at the cost of more LEDs and more heat. Where the build has to be slim, edge-lighting through a light-guide panel removes the depth requirement entirely, though it limits how large a single panel can be before the centre falls off in brightness.
Plan the panel layout around the corners
Light does not turn corners. On a wrapped column or any returned face, each face is its own lit cavity, and the arris between them will read as a line no matter how the panels are joined. That is a property of the lighting, not a fabrication defect, and it is not something a different joint detail solves.
So the layout is planned around it rather than against it. Set the panel breaks where the corners already are, light each face on its own terms so the faces match in brightness and colour, and let the arris read as a deliberate edge of the object. A column detailed this way reads as a lit block with crisp corners. A column detailed in the hope that the corner will disappear reads as a failed attempt at one surface.
Practical notes from installation
Match your LEDs properly. Specify a single colour temperature and a high colour rendering index — 90 or above — where the panel is reproducing a natural material. Insist that all fixtures for a job come from the same production batch, or adjacent panels will show visible colour differences.
Allow for movement. Acrylic expands and contracts far more than the metalwork holding it, in the order of 0.07 mm per metre per degree C. Fixing holes should be oversized and slotted so panels can move. A panel pinned rigidly at both ends will bow or craze as the cavity warms.
Seal the cavity. Dust is invisible on an unlit panel and obvious on a lit one. A sealed cavity with serviceable access is worth the extra detailing, particularly in a showroom or lobby where the panels run all day.
Think about replacement. If one panel in a run is damaged, can it come out without dismantling the others? Ask at order stage, and order a spare from the same run if the answer is no.
Where it earns its place
Backlit acrylic suits situations where you want the presence of a heavy material without its weight, cost, or support structure — showroom columns, reception fronts, lift lobbies, feature walls, bar fronts. It is also the practical answer when a material is simply unavailable at the size required.
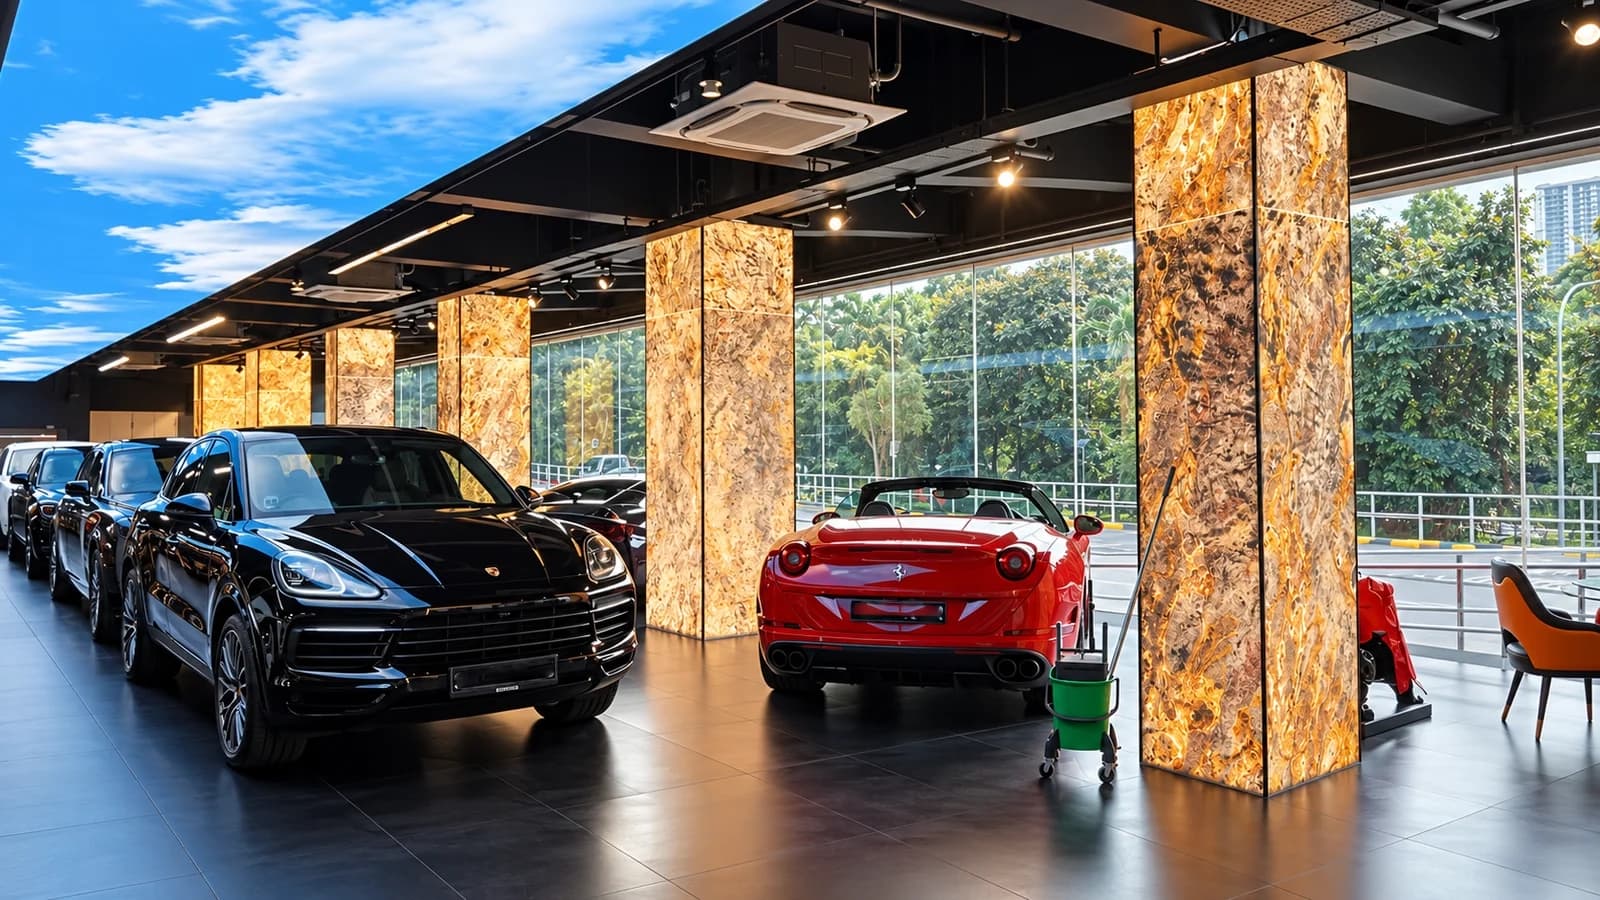
At the Depot car showroom, backlit diffuser panels wrap the showroom columns, lighting the display floor from within rather than from overhead fixtures. The columns do cladding duty and lighting duty at the same time, which is usually where the economics of a backlit build start to make sense.
Written by
Worldbizz Engineering Team